Paddleboarding has rapidly risen in popularity, becoming one of the most popular water sports in the UK.It’s rise in popularity can be attributed to how accessible it is. It requires no special skills, no bizarre environment, and can be adapted for any person. With this said, there are a few basics worth mastering that can make life a lot easier and more fun on a paddleboard! So check out our top 5 basic paddleboarding bits to master.

Pumping
One of the reason’s paddleboarding has become so popular is how easy it is to transport the kit. This is due to most boards being inflatable, packing up into a bag that easily fits on your back. So pumping your board up is something you need to get right at the start of every session. Each board will have a recommended PSI, usually printed near the air valve. This range will be high enough to make the board rigid, improving stability. But make sure you don’t exceed the recommendation as the extra air will cause pressure on the stitching and glue of the board, risking damage.
While pumping the board up you want to try to lock your arms out, keep your back straight, and use your body weight to put the pump down. This technique will save your arms from burning out before you hit the water!
Standing
Getting stood up on the board while afloat is one of the first, and most funny, challenges of paddleboarding. Finding the balancing point can sometimes be a case of some very wet trial and error. However, our top tip is to place your feet either side of the carry handle in the middle of the board. This will position you around the middle of the board where it is most stable. If you aren’t quite up to standing yet, you can start by either sitting or kneeling on the board, offering much more stability.
Paddling
The first thing to get right here is how you are holding your paddle. Getting the paddle the correct way round, your hands in the right place, and placing the paddle deep enough in the water will all make paddling a lot easier.
You’ll notice that the paddle blade (the wide part that goes in the water) is slanted. The blade wants to be angled towards the front of the board, just like the diagram below. This allows you to have a longer paddle stroke, propelling you forwards more efficiently.
One of your hands will be placed horizontally on the end of the paddle that resembles a T. This hand focuses on pushing the paddle down through the water. Your second hand will be vertical on the main shaft of the paddle, about a third of the way down. This hand will pull the paddle towards you in the water. Don’t be afraid to swap which side you paddle on so your arms get a chance to switch between pushing and pulling the paddle.
When you place your paddle in to propel yourself forwards, you want to put the blade fully underwater. This is where you may need to adjust the length of the paddle to make sure you can do this with ease. The deeper you put the paddle the more resistance you will get on it. This is great if you want to get a burst of speed going, but if you are cruising along and wanting to be efficient then you want to just have your paddle blade submerged.

Turning
Getting going forward is great, but what happens when you come across an obstacle and need to get out of the way? This is where knowing how to turn is key. To turn your board you want to make your paddle strokes as wide as possible, sweeping the paddle round away from the board. You can do this with either a forward stroke or a reverse paddle stroke. You may feel a little unstable when you first do this, but that’s alright. Simply drop down to a kneeling position and carry on. Once pointing where you want to be you can hop back up onto your feet, and get going again.
Kit
Making sure you have the correct kit with you will make life easier, and much safer. From what leash you have on to the thermals you wear, they all play a big role. Here is a quick breakdown of the kit you need and why.
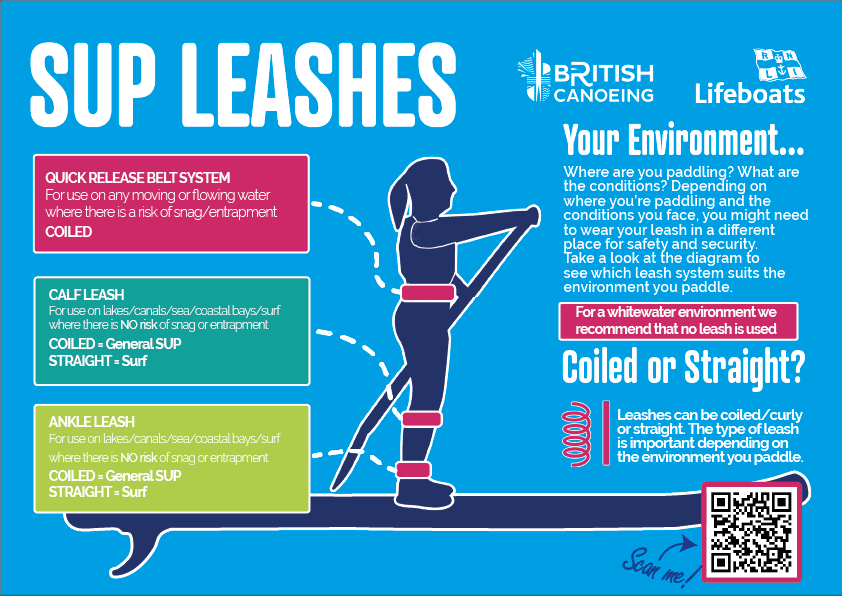
Leash – This attaches you to your board so it doesn’t float off should you fall off it. Having the correct leash attached to you in the proper way could be lifesaving. Please have a look at the diagram below explaining your leash.
Buoyancy Aid – Wearing a buoyancy aid (or PFD) that is fitted correctly is vital. This will help keep you afloat should you end up in the water. There are a wide range of shapes and styles, so you’re sure to find one that fits comfortably. Check out our guide on buying your first one here.
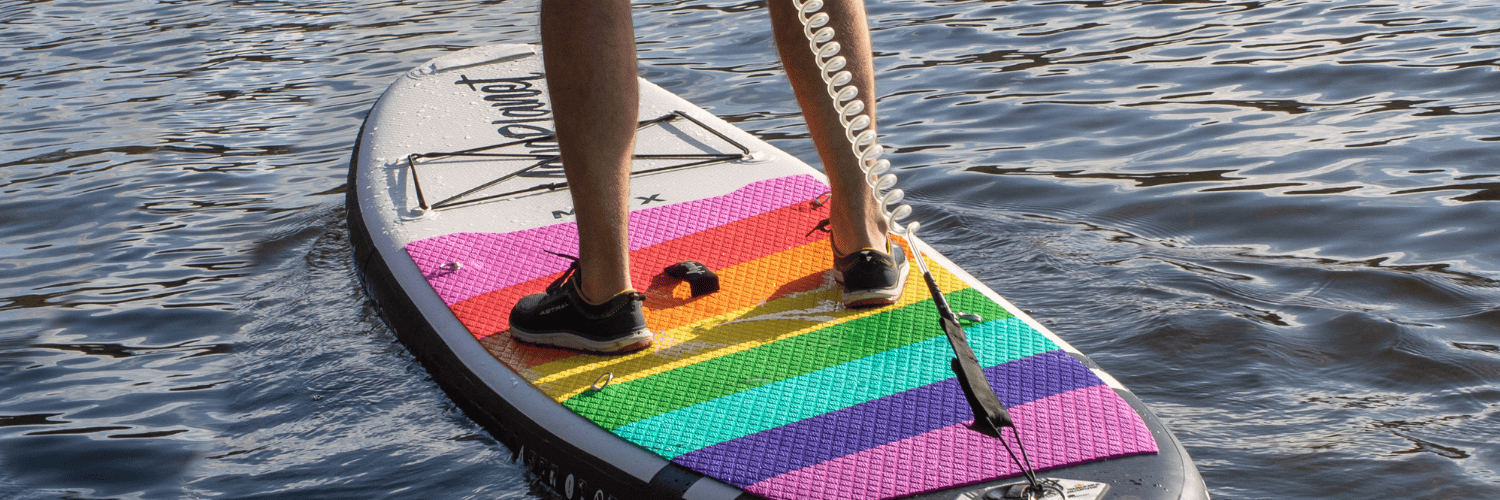
Shoes – Although you are floating on the water, some will run across the top of the board as you naturally rock side to side. So to keep you warm, and your feet gripping to the board, find yourself a good pair of shoes. You can get the classic neoprene shoes with sturdy soles on, or more sleek looking trainers with quick drainage built in.
Base Layers – whether its sunny or cold, having the right layers on will make paddling a lot nicer. UV protection in the sun and thermals in the cold. Just because you are on the water doesn’t mean you should be cold.
 Paddle UK
 Go Paddling
 Clear Access Clear Waters
 Services Login